A Beginner's Guide to Bruno: The Git-Friendly API Client Taking on Postman
For years, Postman has been the go-to API client. But as cloud-based workflows and team syncing have become central to its identity, a new wave of tools is emerging for developers who crave simplicity, speed, and offline, file-based control.
At the forefront of this shift is Bruno – a fast, open-source, and Git-friendly API client that is quickly gaining popularity.
This tutorial will introduce you to what Bruno is, why it’s different, and how to get started with your first requests, tests, and a version-controlled workflow.
What is Bruno?
Bruno is a desktop API client for testing and exploring APIs. Unlike Postman, which syncs your collections to the cloud, Bruno’s core philosophy is to store everything locally on your file system. It uses a plain-text markup language called Bru Lang to save your requests in files ending with .bru.
Why Choose Bruno over Postman? The Core Philosophy
- Git-Friendly Collaboration: Since your API collections are just folders and text files, you can manage them with Git. You can
git clonea repository, see API changes in a pull request, and have a version-controlled history of your endpoints. This is a game-changer for collaboration. - Truly Offline & Local-First: Bruno works entirely offline. There is no cloud sync, no accounts, and no mandatory logins. Your data is yours and lives on your machine.
- Open Source & Free: Bruno is open-source, with a generous free tier that includes features often paywalled in other tools, like environment variables and scripting.
- Lightweight and Fast: The interface is clean, simple, and responsive, focusing on the core task of making API requests without unnecessary clutter.
- Text-Based Simplicity: Using the "Bru" markup language means you can even write or edit API requests in your favorite code editor if you choose.
Part 1: Installation and First Look
Getting started is simple.
-
Download Bruno: Head to the official website at usebruno.com and download the version for your operating system (Windows, macOS, Linux). You can either use installer or download the portable version then extract the zip file. If you proceed with portable version, you should ignore step 2.
-
Install and Launch: Install the application. When you open it, you'll be greeted by a clean, three-pane interface:
- Left Pane: Your collections and environments.
- Middle Pane: The details of your current API request (URL, method, headers, body, tests).
- Right Pane: The response from the server.
Part 2: Creating Your First API Request
Let's make our first GET request using the our AgileTest API - API Document.
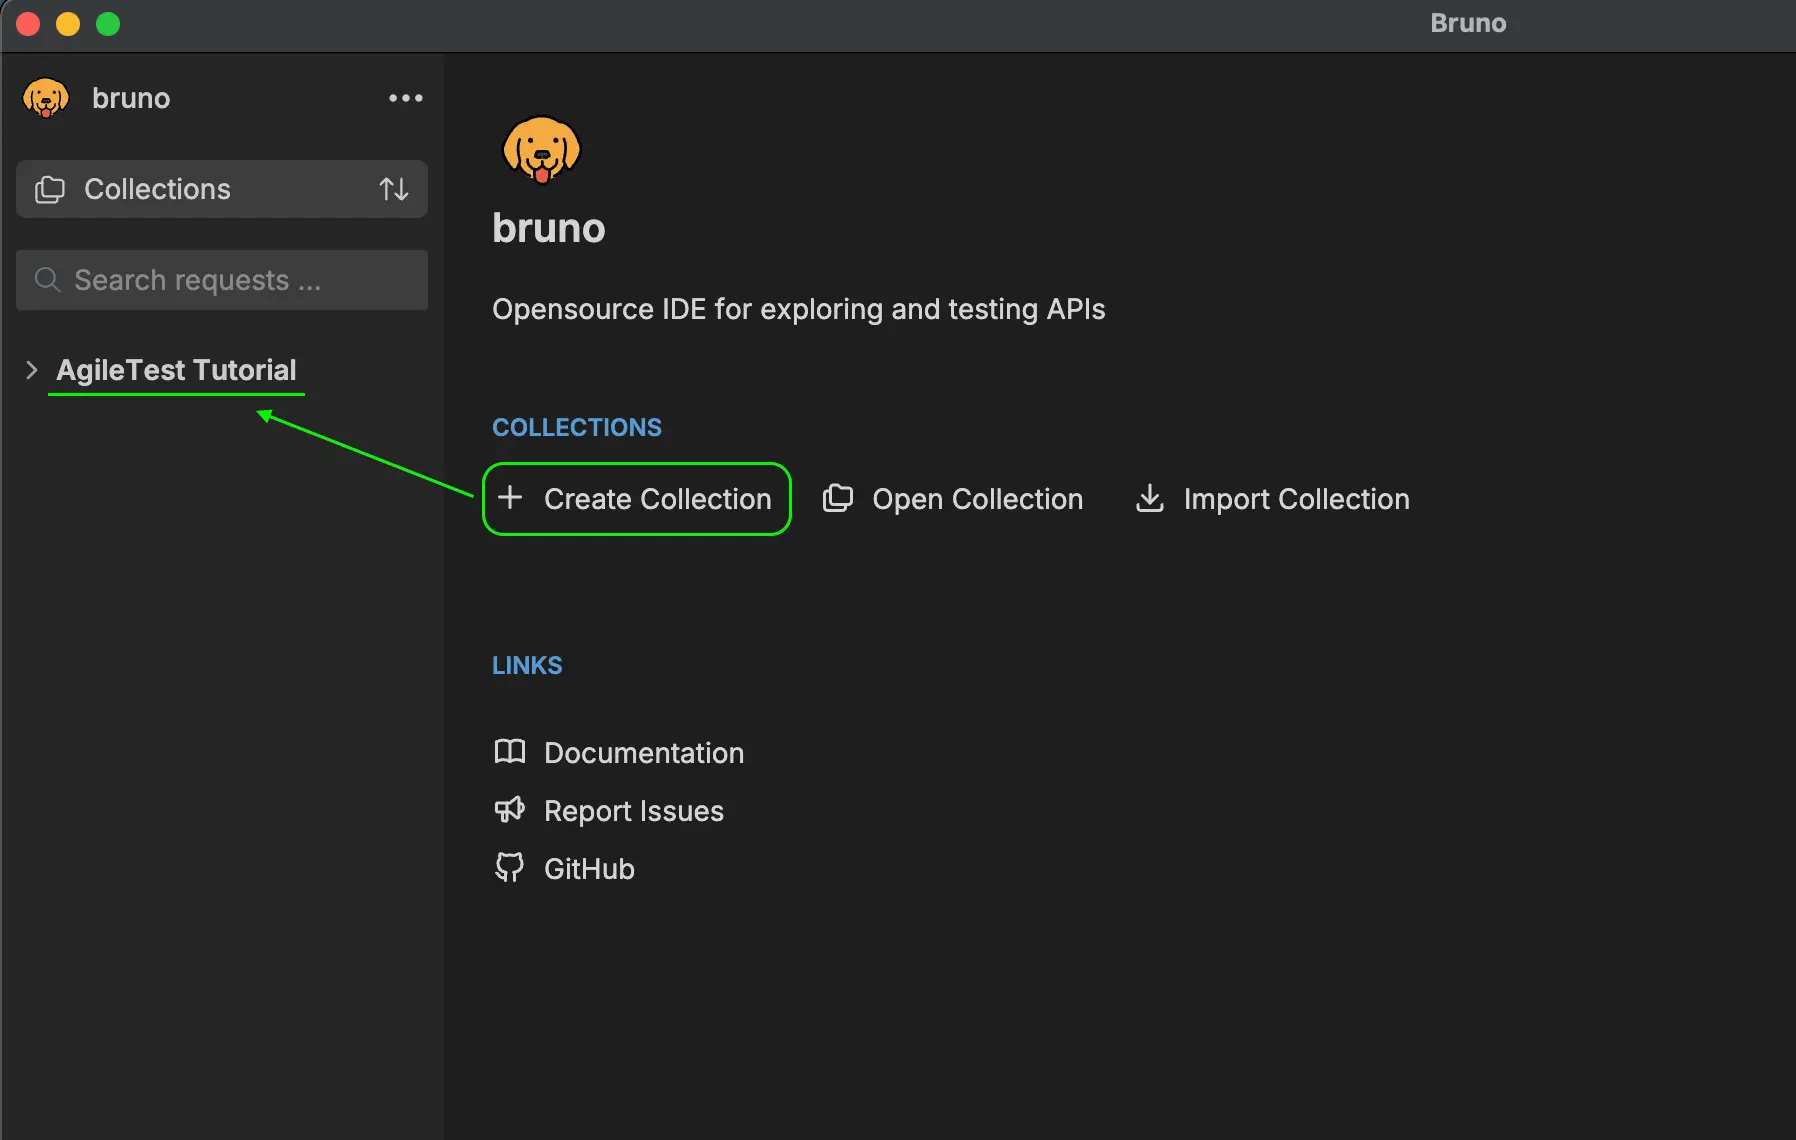
Step 1: Create a Collection A collection is a folder that organizes your API requests.
- Click the "Create Collection" button in the top left.
- Name it
AgileTest Tutorialand choose a location on your computer to save it. Remember, you are just creating a folder on your local disk.
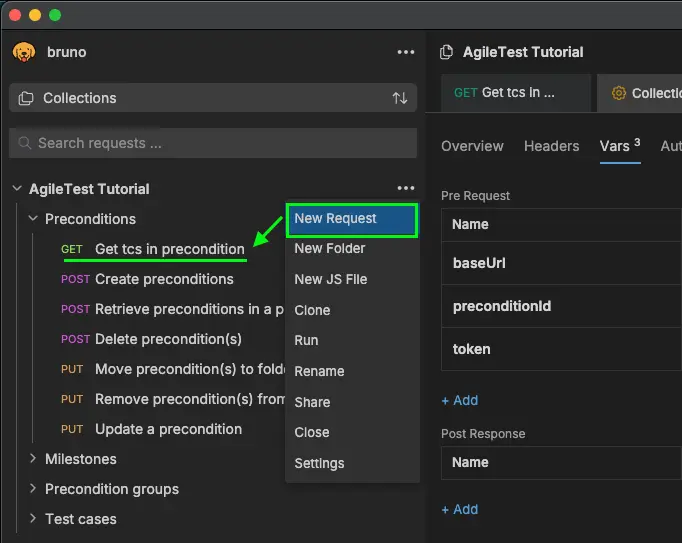
Step 2: Create a New Request
- Click the three dots (
...) next to your new collection and select "New Request". - Name the request
Get tcs in precondition. - Ensure the request type is set to
GET.
Don’t forget to add “Authorization” header with the content: JWT <token>. You should refer to this document to retrieve the token with your credentials (Client id and Client secret - AgileTest API integration).
Step 3: Enter the URL and Send
- In the URL bar in the middle pane, enter:
https://agiletest.atlas.devsamurai.com/ds/preconditions/10932/test-cases?projectId=10090- Click the blue "Send" button (or press
Ctrl/Cmd + Enter).
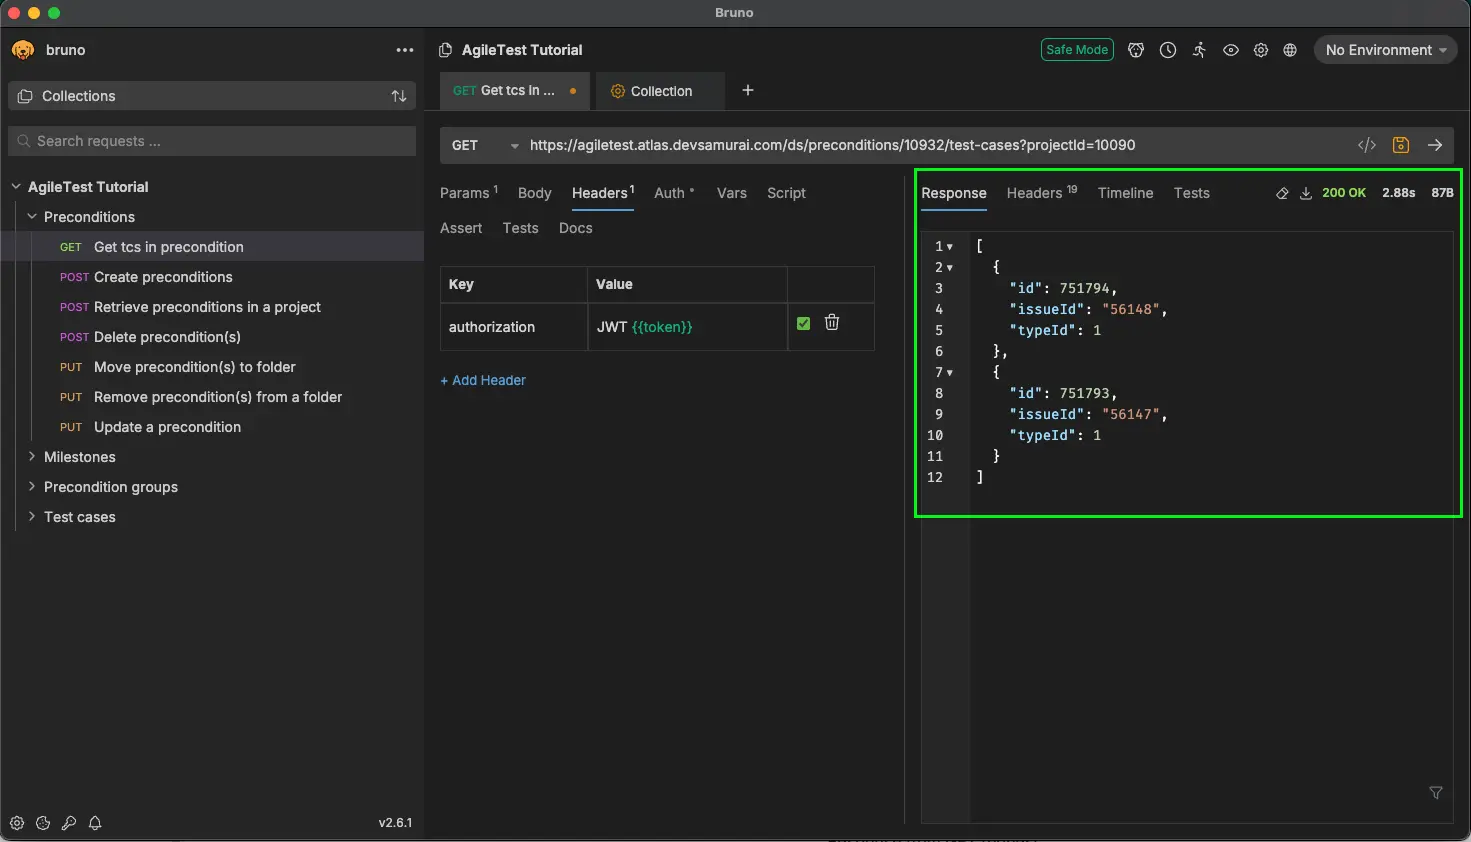
Step 4: Examine the Response The response will appear instantly in the right pane. You'll see:
- The Status Code (e.g.,
200 OK). - The Response Body (the JSON data for linked Test cases).
- Tabs for viewing Headers and timing details.
Part 3: Working with POST Requests and Variables
Now, let's create a new post and use variables to make our requests reusable.
Step 1: Create a POST Request
- Create another new request in your collection named
Create preconditions. - Change the HTTP method from
GETtoPOST. - In the URL bar, enter:
https://agiletest.atlas.devsamurai.com/ds/preconditions
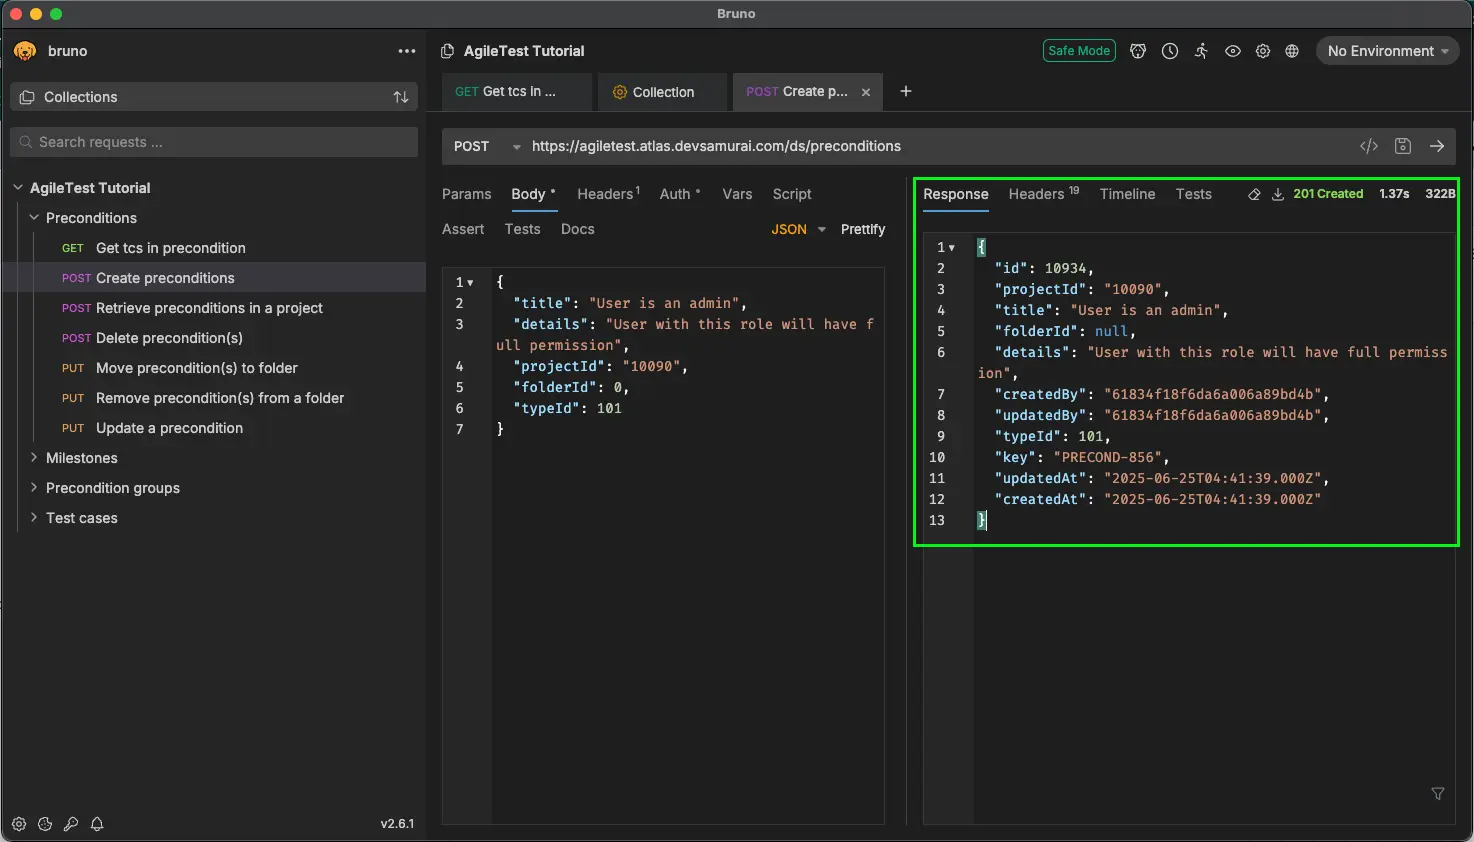
Step 2: Add a JSON Body
- Click on the "Body" tab below the URL bar.
- Select "JSON" from the dropdown menu.
- Enter the following JSON object into the text area:
{
  "title": "User is an admin",
  "details": "User with this role will have full permission",
  "projectId": "10090",
  "folderId": 0,
  "typeId": 101
}
- Click "Send". You'll receive a
201 Createdresponse with the new post object, now including anid.
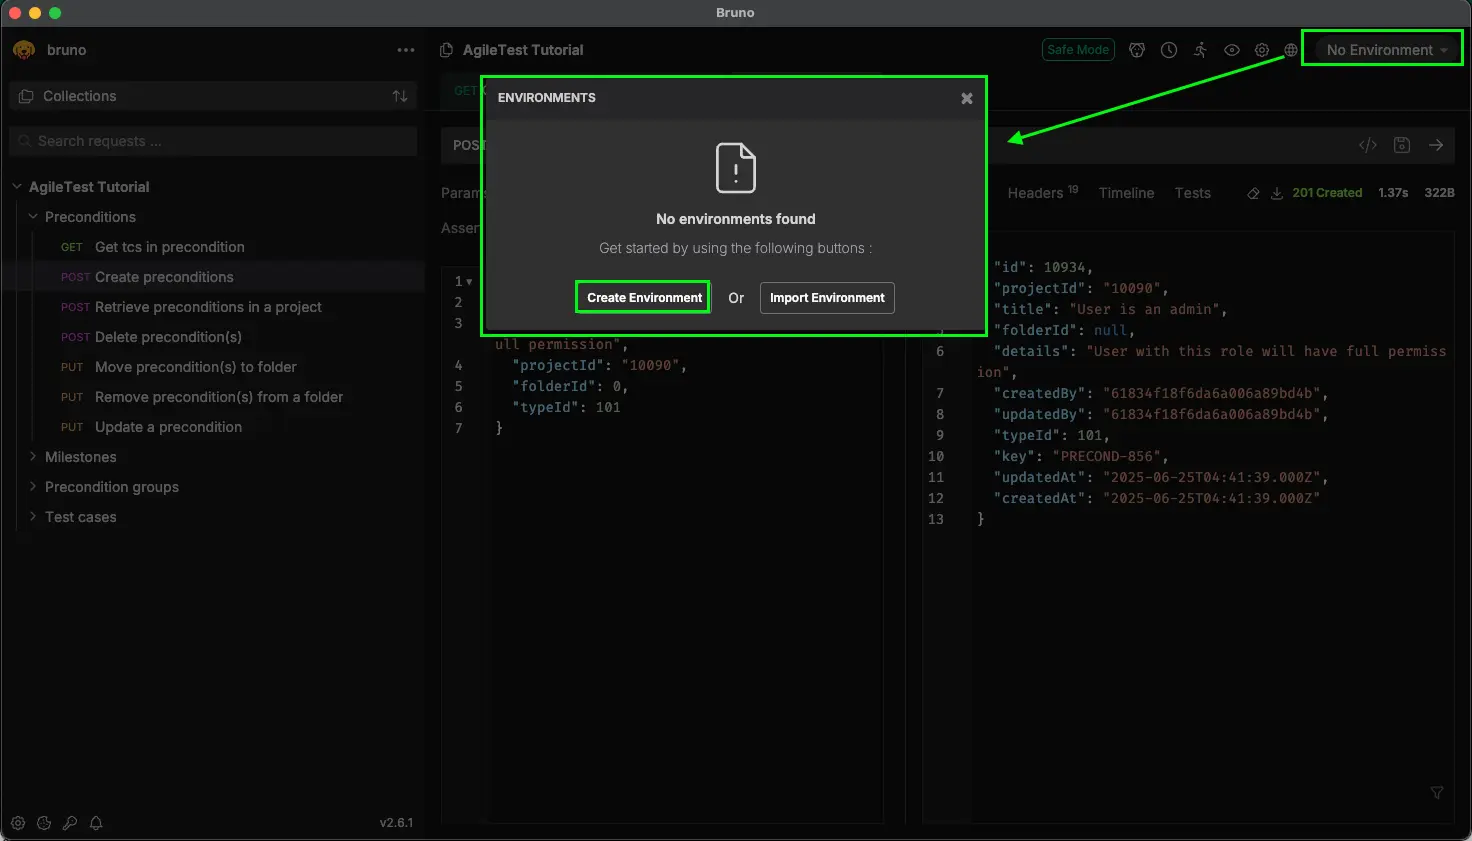
Step 3: Using Environment Variables Hardcoding URLs is bad practice. Let's use an environment variable.
- Click the "No Environment" button in the top right corner.
- Click "Configure", then “Create Environment”, and name it
API Endpoints.
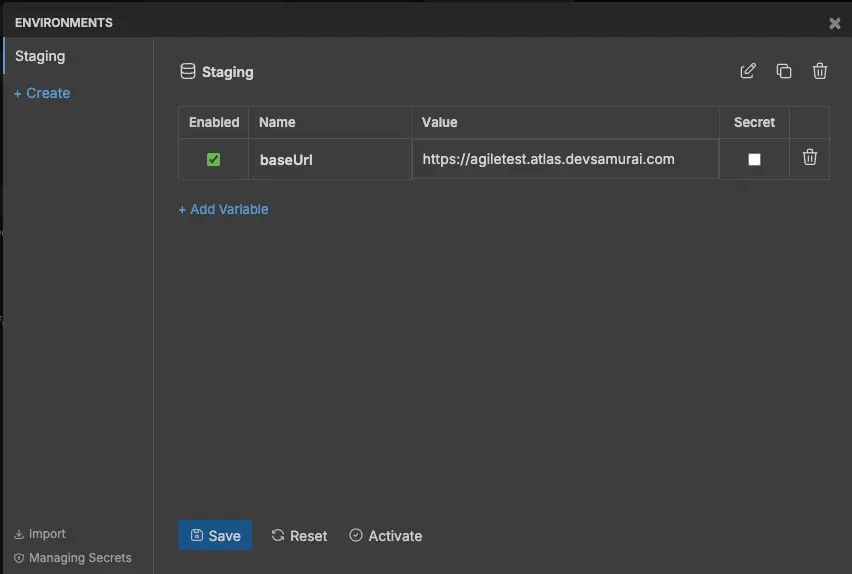
-
Inside this environment, create a new variable:
- Name:
baseUrl - Value:
https://agiletest.atlas.devsamurai.com
- Name:
- Now, go back to your requests. In the top-right of the middle pane, select your
API Endpointsenvironment from the dropdown that currently says "No Environment". - Change the URL in both of your requests to use the variable:
{{baseUrl}}/ds/preconditions/10932/test-cases?projectId=10090
{{baseUrl}}/ds/preconditions
Now you can easily switch between different environments (e.g., Local, Staging, Production) just by changing the baseUrl variable.
Part 4: The "Bruno Magic" - Scripting and Testing
Bruno allows you to write assertions to validate API responses.
- Go back to your
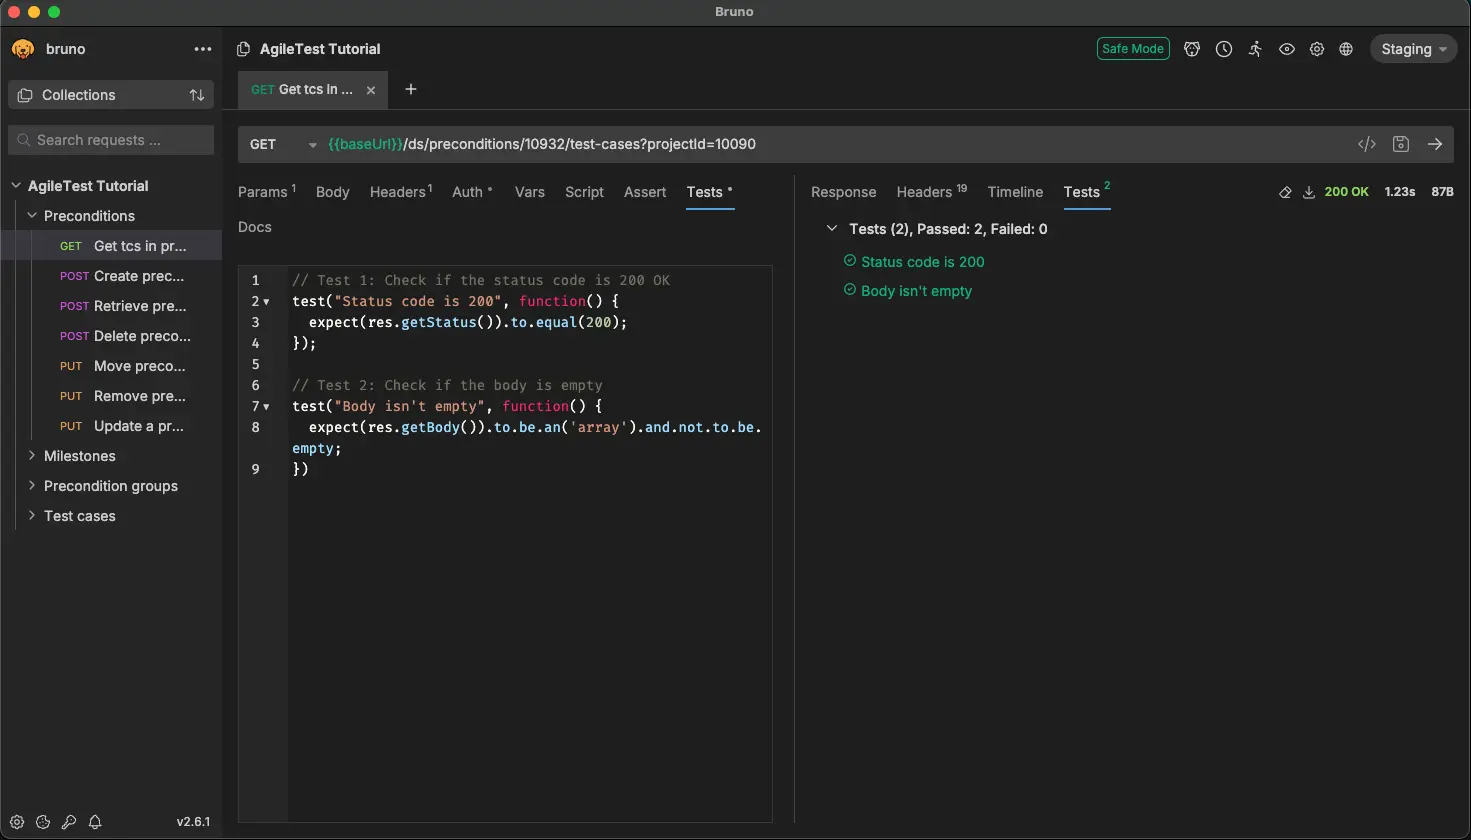
Get tcs in preconditionrequest. - Click the "Tests" tab.
- Enter the following JavaScript code:
// Test 1: Check if the status code is 200 OK
test("Status code is 200", function() {
  expect(res.getStatus()).to.equal(200);
});
// Test 2: Check if the body is empty
test("Body isn't empty", function() {
  expect(res.getBody()).to.be.an('array').and.not.to.be.empty;
})
- Send the request again. Now, look at the "Test Results" tab in the response pane. You should see all three tests passing! This is how you can build a suite of automated API tests.
Part 5: The Git-Friendly Workflow
This is Bruno's superpower. Navigate to the folder where you saved your collection on your computer. You'll see a structure like this:
AgileTest Tutorial/
├── Get tcs in precondition.bru
├── Create preconditions.bru
Each .bru file is a plain-text file containing your request details written in Bru Lang. Below is a code snippet.
meta {
  name: Get tcs in precondition
  type: http
  seq: 1
}
get {
  url: {{baseUrl}}/ds/preconditions/10932/test-cases?projectId=10090
  body: none
  auth: none
}
This means you can:
- Initialize a Git repository in this folder (
git init). - Commit your changes (
git add .,git commit -m "Add initial API requests"). - Push it to GitHub/GitLab to share with your team.
- Your teammates can clone the repository, open the collection in Bruno, and run the requests instantly.
- When someone adds a new endpoint, they create a new
.brufile and submit a pull request. Your team can now review API changes just like they review code!
Conclusion
Bruno offers a refreshing, developer-centric approach to API testing. By prioritizing local file storage and Git integration, it solves many of the collaboration and versioning headaches common with cloud-based tools. While it may not yet have every single feature of Postman, its speed, simplicity, and powerful, offline-first philosophy make it a compelling alternative that is well worth trying for your next project.